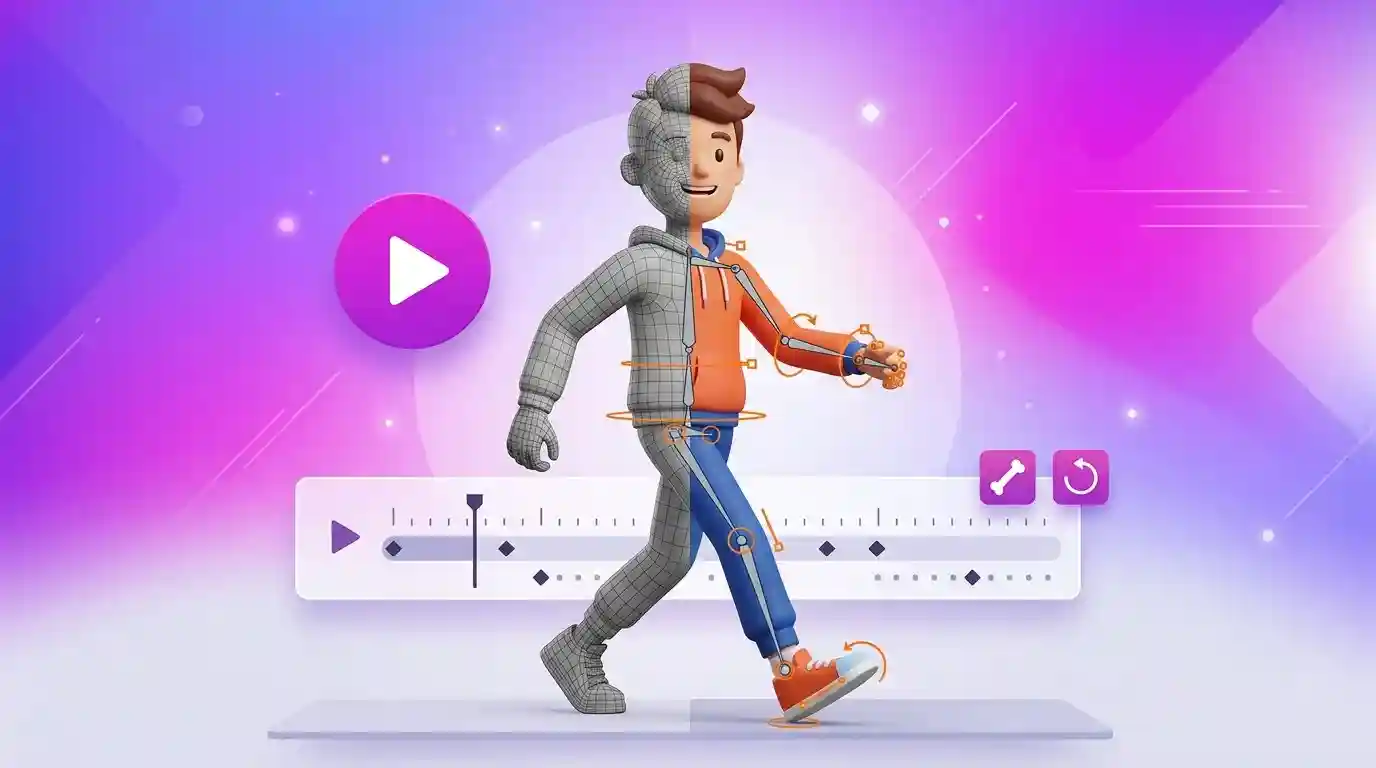
Struggling with stiff 3D characters that take days to rig? That slow process kills creativity and delays your game or video project. Good news: you can rig and animate a character in minutes with a free Adobe tool. This guide shows you what Mixamo does, how to use it right, and how to export clean results for Unity and Unreal.
How Does Mixamo Operate and What Is It?
What Is Mixamo and how can it save you hours of rigging work? Mixamo is a free web service from Adobe that rigs 3D humanoid characters automatically and gives you instant access to a large library of motion capture animations. You upload a static model, you place a few joint markers, and you get a fully rigged character in minutes.
The system uses two core parts that work together. First, the auto-rigger builds a full skeleton, calculates skin weights, and binds your mesh to bones. Second, the animation library lets you preview and apply thousands of tested motion clips to that rigged character.
Installing complicated software is not necessary to get started. You only need a free Adobe ID, a web browser, and a humanoid 3D model in FBX or OBJ format. The process runs in the cloud, so even a basic laptop can handle it.
Key parts of the workflow include:
- Upload: Send a static humanoid mesh with correct pose and scale
- Mark joints: Place chin, wrists, elbows, knees, and groin points
- Auto-rig: Let the cloud service build bones and skin weights
- Animate: Search, preview, trim, and apply motion clips
- Download: Export your character as FBX for games or video
Who Uses This Free Character Tool for Games, Film, and Learning?
Indie game makers use this platform to prototype fast. You can test a third-person controller, an enemy walk cycle, or a dance emote in one afternoon. That speed helps small teams compete with larger studios.
Students and teachers use it to learn core 3D skills. You see how skeletons, joints, and skin weights affect movement in real time. That visual feedback makes rigging concepts much easier to grasp than theory alone.
YouTubers, short film makers, and advertisers use it for quick character acting. You can create a talking host, a product mascot, or a background crowd without hiring a motion capture studio. Many creators pair the clips with Blender or Unreal Engine for final render.
Architects, trainers, and app makers also benefit. You can show safety moves, workout poses, or product demos with clear human motion. The results look clean and professional when you pick the right clip and settings.
Typical users include:
- Solo developers building Unity or Unreal Engine prototypes
- Design students learning rigging and keyframe basics
- Content creators who need fast character motion
- Small studios that need background actors on a budget
- Educators who teach animation, coding, or storytelling
Why Is It Free? What Is the Real Deal With Adobe?
Many new users ask why such a helpful service costs nothing. Adobe offers the auto-rigger and motion library free to support creators and grow its creative ecosystem. You sign in with an Adobe ID, and you can rig, preview, and download for personal and many commercial projects.
The license is generous but it has clear limits. You can use downloaded characters and motions inside your games, films, apps, and client work. You cannot resell or share the raw rigs and motion files as a competing library or marketplace pack.
Always read the current terms on the official Adobe pages before you launch a paid product. Terms can change, and client work often needs extra care. When you stay within the rules, you get high value at zero cost.
Smart ways to stay compliant:
- Use motions inside a finished game, video, or interactive app
- Do not upload raw packs to asset stores for resale
- Do not share your Adobe login with your full team
- A copy of the license text should be kept with your project files.
- Check client contracts if you create work for hire
How Do You Prepare a 3D Character Before You Upload?
Good preparation decides 80 percent of your result quality. Start with a clean humanoid mesh in a T-pose or relaxed A-pose with straight legs and arms slightly away from the body. Remove extra props, cameras, lights, and hidden objects before export.
Check symmetry and proportions carefully. The auto-rigger expects two arms, two legs, a head, and a clear torso. Fused fingers are fine, but crossed legs, bent elbows, or tilted heads often cause twisted bones.
Keep your mesh watertight and simple where possible. Close open holes, merge duplicate vertices, and apply transforms in Blender, Maya, or your modeling app. Aim for 15,000 to 75,000 polygons for games and up to 150,000 for film close-ups.
Use this pre-upload checklist:
- Pose: T-pose or A-pose, feet shoulder-width apart, palms facing down
- Scale: Real-world height near 180 cm, feet on ground plane at Y zero
- Geometry: One merged mesh for body, no non-manifold edges
- Materials: Simple PBR materials, 2K textures or lower for tests
- Format: Export as FBX binary or OBJ with embedded textures
- Naming: Clear file name like hero-male-tpose-v01.fbx
How Does Automatic Rigging Work Step by Step?
You can finish your first automatic rig with Mixamo in under ten minutes when your model is clean. Upload your FBX or OBJ file, wait for the preview to load, then place skeleton markers exactly on the joints shown in the guide image. Press Next and let the cloud solver build bones and skin weights for you.
Follow these exact steps for best accuracy:
- Sign in with your Adobe ID and click Upload Character
- Drag your file into the window and wait for the 3D preview
- Confirm orientation: face forward, feet on grid, arms in T or A pose
- Place chin marker on the chin tip, not on the lips
- Place wrists slightly below the palm joint line
- Place elbows on the outer point of the bent arm line
- Place knees on the kneecap center and groin at pelvis base
- Click Next, then review the skeleton overlay from front and side
- Click Next again to start the skinning calculation
- Test with a simple idle and walk to check shoulders and hips
Review the skeleton before you accept it. Look at elbows, shoulders, and hips from the side view. If a marker sits off by even a few pixels, go back and fix it now to avoid hours of cleanup later.
Save each good rig with a clear version name. Keep v01 for your first pass, v02 after marker fixes, and final for the approved file. That habit saves time when you test multiple animation sets.
Where Can You Find the Best Motion Capture Animations?
You can find top quality motion clips inside the built-in library that ships with Mixamo search and filters. Type simple action words like idle, walk, run, jump, punch, dance, or sitting to see curated results in seconds. Use side filters for category, style, and arm movement to narrow hundreds of options to the best ten.
Start with clean basics before you try stylized moves. A neutral idle, a confident walk, and a sharp turn will carry most game demos. Add one signature move like a wave, a fall, or a victory pose to give your character charm.
Preview each clip on your own character, not just on the demo skeleton. Pay attention to foot sliding, hand clipping, and hip bounce. Small flaws look bigger once you add camera shake or fast gameplay.
Best categories to explore first:
- Basics: Idle, walk, run, turn, stop, jump, land, crouch
- Combat: Punch, kick, block, dodge, sword slash, aim, reload
- Social: Wave, clap, point, talk, laugh, nod, shake hands
- Workplace: Typing, lifting, pushing, carrying, climbing ladder
- Dance and sports: Hip hop, salsa, dribble, kick ball, stretch
- Sitting and lying: Sit chair, sit floor, sleep, get up, fall down
Pro tip: favorite 15 to 20 clips for your project and download them with the same skeleton and frame rate. Consistent settings make blending and retargeting far easier in Unity and Unreal Engine.
How Do You Customize and Blend Animations Like a Pro?
Great motion needs small edits, not just raw downloads. Use trim sliders to cut extra frames at the start and end of each clip. Clean cuts remove foot pops and make loops feel smooth and natural.
Adjust speed, intensity, and arm space to match your character story. A tired guard walks slower with low arms, while a hero runs tall with wide swings. Mirror a punch or turn to create left and right versions without new downloads.
Choose between in-place and root motion based on your game code. In-place keeps the character at the origin while feet move, which suits most Unity controllers. Root motion moves the hips forward in space, which suits cinematic shots or Unreal Engine montages.
Use these pro settings for cleaner results:
- Trim 5 to 10 frames from both ends to remove settle motion
- Set 30 fps for mobile games and 60 fps for film close-ups
- Turn on Mirror to double your variation library fast
- Test loop, then check hips from side view for bounce
- Keep hips stable for idle office scenes and loose for dance
Blend clips inside your engine for extra polish. Crossfade 0.2 seconds from idle to walk and 0.15 seconds from walk to run. Add a slight head look or hand IK on top to make interactions feel alive.
What File Formats and Settings Should You Use for Export?
FBX binary is the best export choice for almost every workflow. It stores mesh, skeleton, skin weights, and motion in one file that Unity, Unreal Engine, Blender, and Maya all read well. OBJ works for static upload only because it cannot store bones or motion.
Download with skin when you need the full character and without skin when you only need motion for an existing rigged model. With skin gives you mesh plus animation in one file. Without skin gives you a smaller motion-only file that you retarget to your hero rig.
Match frame rate and pose across your full pack. Do not mix 30 fps walks with 60 fps idles unless your engine retimes them. Keep the same T-pose and bone names to avoid broken retargets.
Recommended export presets:
- For Unity mobile: FBX, 30 fps, with skin for hero, without skin for extra clips
- For Unity PC and console: FBX, 30 or 60 fps, keyframe reduction on
- For Unreal Engine: FBX, 30 fps, with skin first, then motion-only clips
- For Blender render: FBX, 60 fps, with skin, import with automatic bone orientation
- For web AR: FBX then convert to GLB, 30 fps, under 5 MB per clip
Name files with a clear system from day one. Try hero-idle-30fps.fbx, hero-walk-30fps.fbx, and enemy-attack-01-30fps.fbx. Clear names speed up imports and prevent painful overwrites later.
How Do You Use Mixamo Characters in Unity and Unreal Engine?
How do you move Mixamo characters into Unity without broken arms or sliding feet? Import your hero FBX with skin first, set Rig to Humanoid, and create an Avatar from that file. Then import motion-only clips, set them to use that same Avatar, and loop time for idles and walks.
Follow this Unity checklist for clean results:
- Drag hero FBX into Assets, select it, open Rig tab
- Set Animation Type to Humanoid and click Apply, then Configure Avatar
- Check all bones green, fix head and hands if yellow, click Done
- For each motion clip, set Rig to Humanoid and Avatar Source to your hero Avatar
- Enable Loop Time for idle, walk, and run under Animation tab
- Place hero in scene with Animator Controller and test transitions
Unreal Engine needs a slightly different path but the idea stays simple. Import the skinned hero FBX as Skeletal Mesh with Import Animations on for the first file. Then import extra motions as animation-only and retarget them to your hero skeleton with IK Retargeter.
Use these Unreal Engine tips:
- Enable Import Mesh on first import, disable it for motion-only files
- Set skeleton to your hero skeleton, not a new one per clip
- Use root motion only for montages and cinematics
- Add foot IK and pelvis offset to fix ground contact
- Test in third-person map before you build AI logic
Blender users can join the same pipeline with ease. Import FBX with the default armature settings, check scale at 0.01 if the model looks tiny, and use the NLA editor to string clips together. Export again as FBX or GLB for web, AR, or client review.
What Are Common Rigging Problems and How Do You Fix Them Fast?
Twisted shoulders are the most common issue for new users. Markers placed too high on the wrist or too low on the elbow pull the arm chain out of line. Move markers exactly to joint pivots, re-rig, and test with a T-pose wave to confirm clean rotation.
Bent knees and flipped hips often come from poor starting pose. Legs must stay straight with feet flat and toes forward during upload. Fix the source pose in Blender, re-export, and upload again instead of trying to patch a bad rig.
Popping feet and sliding steps usually point to mismatched export modes. In-place clips need forward motion from code, while root motion clips move on their own. Pick one system per character and stick with it across all clips.
Quick fix table for busy creators:
- Shoulders clip through head: lower chin marker, raise elbow markers, re-rig
- Elbows bend backward: move elbow markers outward by 2 pixels, retest
- Wrists twist 180 degrees: place wrist dots below palm line, not on fingers
- Hips sink below floor: set feet at Y zero before upload, re-export
- Fingers merge: separate hand meshes slightly, keep mitten style for games
- Head tilts: center chin marker, check neck symmetry in modeling app
Test every fix with the same three clips: idle, walk, and jump. If those three look clean from front, side, and back views, your rig will handle 90 percent of other motions well. Save that approved version and lock it before your team builds gameplay on top.
Mixamo vs Manual Rigging vs Paid Motion Capture: Which Wins?
Which option gives you the best mix of speed, cost, and quality? The table below compares automatic rigging with hand rigging in Blender or Maya and full studio capture with suits and cameras. Use it to pick the right path for your budget and deadline.
| Feature | Free Auto-Rigger + Library | Manual Rig in Blender / Maya | Studio Motion Capture Suit |
| Best for | Prototypes, indie games, student films, YouTube | Hero film characters, custom creatures | AAA games, feature films, precise acting |
| Time to first animated character | 10 to 20 minutes | 2 to 5 days | 1 to 3 days plus studio booking |
| Typical cost in 2026 | Free with Adobe ID | Artist time, 300 to 1500 dollars per rig | 2000 dollars and up per shoot day |
| Skill needed | Beginner friendly, guided markers | Advanced weight painting and controls | Directing plus cleanup artists |
| Animation count | Thousands of ready clips, instant preview | Zero included, you key every move | Custom only, limited by shoot time |
| Character types | Humanoids work best, creatures limited | Any shape, full control | Human actors, hard for monsters |
| Quality control | High for basics, stylized moves may need trim | Highest when done by a pro | Most natural acting, needs cleanup |
| Revisions | Swap clips in seconds, re-download free | Slow, each change needs new keys | Costly reshoots for small fixes |
The smart choice for most beginners is clear. Start with the free auto-rigger to learn timing, loops, and game logic. Move to manual rigging or studio capture only when your hero character earns that extra budget.
Many pro teams mix all three methods in one project. They use automatic clips for background crowds, hand keys for hero face acting, and capture sessions for key cinematics. That hybrid plan saves money while keeping top quality where players look most.
Is Maximo or Mixoko the Same as Mixamo? Spelling Explained
Do maximo, mixoko, and Mixamo point to the same service? No, only one spelling is correct for the official Adobe character tool. The right name uses i, x, a, m, o in that exact order, while maximo and mixoko are common typos from fast typing or voice search.
These small spelling errors can lead you to copycat sites, old blog posts, or unrelated products. One wrong letter can waste an hour or expose you to unsafe downloads. Always check for the Adobe login screen and secure https address before you upload your art.
Use these safety checks every time:
- Type the name slowly and confirm each letter before you press Enter
- Look for Sign in with Adobe ID on the login page
- Avoid sites that ask for credit cards for basic rigging
- After your initial successful visit, bookmark the official page.
- Search with extra words like Adobe auto-rigger official site
If you run a blog or classroom, teach the correct spelling early. Add the two common typos to your FAQ so students still find your help guide. That small step builds trust and keeps beginners safe from fakes.
How Can Beginners Build Real Skills With a Simple 7-Day Plan?
You do not need months to feel confident with 3D motion. Follow this focused 7-day plan for 45 minutes per day and you will rig, animate, and publish your first clip. Each day builds directly on the last one.
Day 1 focuses on setup and first rig. Create your Adobe ID, upload a sample robot, place markers with care, and download your first idle. Day 2 covers cleanup and T-pose basics in Blender with scale, rotation, and export practice.
Day 3 to Day 5 build your motion set. Download and test idle, walk, run, jump, wave, and sit clips with matching frame rates. Trim ends, fix foot slide, and favorite your best ten for your demo reel.
Day 6 moves to game engines. Import your hero into Unity with Humanoid Avatar or into Unreal Engine as Skeletal Mesh. Build a simple blend between idle and walk with keyboard input.
Day 7 is publish day for feedback and growth. Record a 20-second video, post it in a game dev group, and ask two clear questions about timing and feet. Apply the best tip you receive and re-upload the improved clip the same day.
Your 7-day checklist:
- Day 1: Account setup plus first successful auto-rig
- Day 2: Clean T-pose, correct scale, FBX export test
- Day 3: Core set of idle, walk, run with clean loops
- Day 4: Personality set of wave, sit, dance, and emote
- Day 5: Trim, mirror, and rename full pack consistently
- Day 6: Working Unity or Unreal Engine blend demo
- Day 7: Published video plus one round of feedback fixes
Top Questions About Free 3D Rigging Answered
Is Mixamo really free for commercial games?
Yes, Mixamo is free to use inside many personal and commercial projects when you follow Adobe terms. You can ship motions inside finished games and videos, but you cannot resell the raw files as a pack.
Do I need to credit Adobe in my game credits?
You do not need forced credit for most uses, but short credit builds trust with players. Add a line like Character motion created with Adobe auto-rigger in your credits or description.
Can I upload my own character from Blender?
Yes, you can upload your own humanoid model when it uses a clean T-pose or A-pose. Export as FBX binary, keep feet on the ground plane, and remove extra cameras and lights first.
Which export setting works best for Unity beginners?
FBX at 30 fps with skin for your hero and without skin for extra clips works best. Set the hero rig to Humanoid, reuse the same Avatar for all clips, and enable Loop Time for idles and walks.
Why does my character twist or bend strangely?
Twists almost always come from off-center markers or a crooked starting pose. Fix chin, wrist, elbow, knee, and groin points to exact joint centers, straighten legs in your modeling app, then rig again.
Can I edit downloaded motion in Blender or Maya?
Yes, you can refine any FBX clip with full keyframe control. Import the file, bake the animation to controls, adjust hips and feet, then export a clean loop for your engine.
Your Next Step: Animate Your First Character Today
You now hold a complete roadmap from upload to game-ready motion. Pick one simple robot or stylized human, rig it with Mixamo today, and test three moves: idle, walk, and wave. That tiny win will teach you more than hours of theory videos.
Take action in the next 30 minutes while ideas stay fresh. Create your free Adobe ID, upload your T-pose model, and download your first FBX pack with matching frame rates. Then import that pack into Unity or Unreal Engine and record your first 10-second test.
Share your result and keep growing with feedback. Post your clip in a creator group, ask what to improve, and help one beginner with marker placement. Small consistent steps like these build real authority, strong skills, and a portfolio that ranks, earns trust, and wins work.