Quick Answer
Whitening trays are flexible plastic mouthguards that hold peroxide gel against your teeth. The gel breaks down stain molecules inside the enamel, so teeth actually get lighter instead of just surface-cleaned. Dentist-made trays with 10% carbamide peroxide are the best-studied at-home method. Most people see a visible change within 3 to 5 days and finish a full treatment in 1 to 2 weeks.
Yellow teeth make you think twice before smiling in photos, at work, or on a first date. Whitening strips slide around, whitening toothpaste barely moves the shade, and a $1,000 in-office treatment stings worse than the invoice itself. Whitening trays offer a smarter middle path: dentist-style bleaching you do at home, at a fraction of the price. This guide shows how they work, what they cost, and how to use them safely.
What Are Whitening Trays?
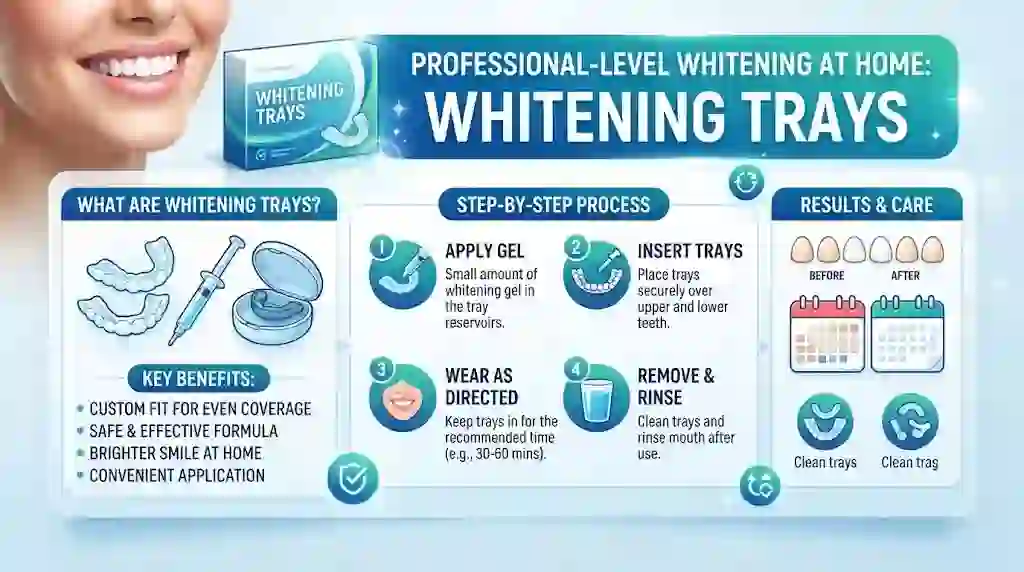
Whitening trays are thin, clear plastic molds that fit over your teeth and hold a bleaching gel in place. Think of them as custom-made delivery systems for peroxide. The tray keeps the gel pressed against your enamel while keeping saliva away, so the whitening agent can do its job.
Dentists first popularized this method in 1989, when a study in the Journal of the American Dental Association described “nightguard vital bleaching.” Patients slept in soft trays filled with 10% carbamide peroxide gel and woke up with gradually whiter teeth. Three decades later, the basic design still works.
You’ll find three main types on the market today:
- Custom trays – made by a dental lab from impressions or scans of your teeth
- Boil-and-bite trays – softened in hot water, then molded at home with your fingers and bite
- Prefilled trays – disposable trays sold ready-loaded with gel, like Opalescence Go
How Do Whitening Trays Work? The Science Made Simple
Every whitening gel relies on one of two active ingredients: hydrogen peroxide or carbamide peroxide. Carbamide peroxide is the slower cousin — it breaks down into hydrogen peroxide once it touches your teeth. A 10% carbamide peroxide gel releases roughly 3.5% hydrogen peroxide.
Here’s what happens after you seat the tray. The peroxide slips through the microscopic pores in your enamel and reaches the dentin underneath. Stains live there as dark pigment molecules called chromogens. Peroxide oxidizes those molecules, breaking them into smaller, colorless pieces. Your teeth look lighter because the stain itself has been chemically taken apart.
The tray matters more than most people realize. Strips only cover the front surfaces they touch, and saliva quickly washes away paint-on gels. A well-fitted tray seals the gel against every surface, including the gaps between teeth where strips fold and crease. That seal is why trays deliver more even results than nearly any other at-home option.
Custom vs. Store-Bought Whitening Trays: Which One Fits You?
Fit drives everything: results, comfort, and safety. A tray that hugs your teeth keeps the gel where it belongs. A loose tray lets gel leak onto your gums, which causes irritation and wasted product. This table breaks down your four realistic options.
| Method | Upfront Cost | Peroxide Strength | Fit & Comfort | Daily Wear Time | Typical Results | Sensitivity Risk | Best For |
|---|---|---|---|---|---|---|---|
| Custom trays (dentist-made) | $150–$500 | 10–22% carbamide peroxide | Gold standard — molded from a scan or impression of your mouth | 30 minutes to overnight | 4–8 shades lighter in 1–2 weeks; results last 6–12+ months | Low to moderate | Best overall value and even coverage |
| Boil-and-bite trays (drugstore kit) | $15–$60 | Usually 5–10% carbamide peroxide | Decent if you mold it carefully; often loose in spots | 30–60 minutes | 2–4 shades in 2–3 weeks | Moderate (gel leaks onto gums) | Tight budgets and first-timers |
| Prefilled trays (e.g., Opalescence Go) | $25–$70 per box | 6–10% hydrogen or carbamide peroxide | One-size-fits-most; no molding needed | 15–30 minutes | 2–4 shades in 1–2 weeks | Low to moderate | Travel, convenience, sensitive gag reflex |
| Whitening strips (e.g., Crest 3DWhitestrips) | $20–$60 | 6–10% hydrogen peroxide | Adhesive film, no tray; can slip and fold | 30 minutes | 2–4 shades, front teeth only | Moderate | Quick touch-ups between treatments |
| In-office bleaching (e.g., Philips Zoom) | $500–$1,500 | 25–40% hydrogen peroxide | Dentist applies gel with gum barriers | One 60–90 minute visit | 5–10 shades, same day | Highest | Fast, dramatic results before an event |
One detail worth knowing: the American Dental Association has granted its Seal of Acceptance only to dentist-dispensed, tray-based home products containing 10% carbamide peroxide. No over-the-counter bleaching product carries the seal, because the ADA believes a professional consultation should come first.
If a custom tray from your dentist stretches your budget, a carefully molded boil-and-bite tray still beats strips for coverage. Buy the tray and the gel separately if you can — all-in-one kits often pair a decent tray with weak gel.
Whitening Trays vs. Whitening Strips: Which Wins?
The 2018 Cochrane review on home-based bleaching found that both tray gels and strips whiten teeth better than placebo. So the real question isn’t “do they work?” — it’s “which fits your mouth and your goals?”
Trays win on coverage. They whiten the sides of your teeth, the gaps between them, and your back teeth. Strips brighten only the front six to eight teeth they physically touch, and they fold into the crevices between teeth, leaving uneven edges.
Strips win on convenience. You peel, stick, and go. There’s nothing to clean afterward, and the upfront cost runs lower. For a wedding next weekend where only your front teeth will show, strips make sense.
Where trays pull ahead is control. With a tray, you choose your gel strength, your wear time, and how long your treatment runs. When your teeth reach the shade you want, you simply stop and store the trays for touch-ups months later. Strips force you into one concentration and one schedule.
How Much Do Whitening Trays Cost in 2026?
Prices range from about the cost of a pizza to the cost of a car payment. Here’s the honest breakdown:
- Boil-and-bite kit (tray + gel): $15–$60
- Prefilled tray boxes: $25–$70 per box
- Custom trays alone (from a dentist): $150–$500
- Full dentist kit (custom trays + gel + supervision): $250–$600
- Refill gel syringes: $10–$25 each; one syringe covers roughly 2–3 full treatments
- In-office bleaching for comparison: $500–$1,500 per session
Do the long-term math before you buy. Custom trays cost more on day one, but they last for years. You only pay for refill gel when you need a touch-up, which makes the cost per treatment drop below drugstore kits over time. A prefilled tray box you throw away every cycle never gets cheaper.
Dental insurance almost never covers cosmetic whitening. However, some dental schools offer custom trays at reduced rates, and many dental offices run whitening promotions around the holidays or during Dental Hygiene Month in October.
How to Use Whitening Trays: Step-by-Step
Follow this routine and you’ll avoid the mistakes that waste gel and irritate gums.
- Brush and floss first. Plaque and food debris block gel from reaching your enamel. Flossing matters most in the tight contacts between teeth.
- Apply a thin bead of gel. Squeeze a small dot — about the size of a sesame seed — onto the front surface of each tooth slot in the tray. Most people need only 0.5 mL per tray. More gel means more overflow, not faster whitening.
- Seat the tray firmly. Press it over your teeth and hold for a few seconds. Check in a mirror for a snug, even fit.
- Wipe away overflow. Use a tissue, a cotton swab, or a soft toothbrush to remove any gel that squeezes onto your gums. This one habit prevents most gum irritation.
- Set a timer for your concentration. Higher percentages of carbamide peroxide call for shorter sessions. Follow your dentist’s instructions or the gel manufacturer’s directions exactly.
- Remove, rinse, and clean. Take the tray off, rinse your mouth with lukewarm water, and brush the tray with a soft toothbrush. Never use hot water — heat warps the plastic.
- Skip staining foods right after. For at least 30 to 60 minutes after each session, avoid coffee, tea, red wine, tomato sauce, and anything dark. Your enamel stays slightly more porous during treatment, so stains set faster than usual.
How Long Do Whitening Trays Take to Work?
Patience pays here. Your teeth didn’t stain in a week, and they won’t lighten in one either.
- Days 1–3: Little to no visible change. Peroxide is penetrating enamel and starting to break down pigment.
- Days 3–5: The first honest difference shows up, usually noticed by someone else before you see it.
- Week 1–2: The main event. Most complete a full treatment course over 10 to 14 days.
- Week 3 and beyond: Stubborn, older stains (like tetracycline staining or deep gray hues) may need 4 to 8 weeks of consistent use or a dentist’s help.
Two rules govern your speed. Higher gel concentration shortens daily wear time but raises sensitivity odds. Lower concentration needs longer sessions but treats your teeth more gently. Research published in 2025 found that 10% carbamide peroxide whitens as well as stronger gels while causing the least sensitivity — a strong argument for starting low.
Are Whitening Trays Safe? What the Research Says
Used as directed, whitening trays are safe for healthy teeth, and the evidence behind that statement runs deep.
The American Dental Association reports that peroxide-based bleaching used at home produces tooth sensitivity in up to two-thirds of users during the early stages of treatment. Before that number scares you, read the second half: the sensitivity is typically mild and short-lived. It usually shows up two to three days into treatment and resolves by around the fourth day after you finish.
The Cochrane review of home-based bleaching reached the same conclusion. Across dozens of trials, the most common side effects were tooth sensitivity and gum irritation. Both occurred more often at higher gel concentrations, and both were mild and temporary. No trial reported serious harm from properly used home trays.
Three smart safety rules protect you further:
- Start with a dental checkup. A cavity or receded gum lets peroxide reach the nerve and turns mild zingers into real pain. Your dentist can also confirm whether your stains will respond to bleaching at all.
- Respect the concentration ceiling. Home use tops out around 22% carbamide peroxide. Anything stronger belongs in a dental office with gum barriers.
- Look for the ADA Seal of Acceptance on dentist-dispensed products containing 10% carbamide peroxide — the only home-use bleaching category the ADA currently endorses.
How to Stop Tooth Sensitivity Before It Starts
Sensitivity is the number one reason people quit whitening halfway through. You can almost always prevent it with a few cheap moves.
Start using a potassium nitrate toothpaste, like Sensodyne, two weeks before your first session. Potassium nitrate calms the nerve inside each tooth, and studies show desensitizing ingredients reduce bleaching sensitivity without dulling your results.
Then adjust your routine instead of pushing through pain:
- Shorten each session by 15 minutes
- Whiten every other day instead of daily
- Switch to a lower gel concentration
- Rinse with a fluoride mouthwash after each session
- Skip acidic food and drinks (citrus, soda, sports drinks) on treatment days
One warning worth repeating: never whiten through sharp pain. A quick zing from cold water is normal sensitivity. A tooth that aches on its own could be a cavity masquerading as a whitening side effect. Call your dentist and pause treatment until it’s checked.
Do LED Whitening Trays Work Better?
Walk through any mall kiosk ad and you’d think the glowing blue light is doing the whitening. It isn’t.
Clinical reviews have repeatedly found that light activation adds little to no extra whitening for at-home treatments, and it may actually increase sensitivity by heating the gel and the tooth surface. The peroxide does the work. The light provides the theater.
That doesn’t make LED whitening trays useless. Many well-designed products pair a mild gel with a built-in LED timer, and the light often serves as a convenient countdown clock. If you enjoy the gadget factor and the price is right, go ahead. Just don’t pay a premium for the glow, and don’t believe claims that light cuts treatment from two weeks to ten minutes. Peroxide chemistry doesn’t work that way.
Who Should Not Use Whitening Trays?
Whitening trays are safe for most healthy adults, but a few groups should wait or skip them entirely. Check this list before you buy anything:
- Children and young teens — developing teeth respond unpredictably to peroxide
- Pregnant or breastfeeding women — no strong evidence of harm, but no solid safety data either, so dentists advise waiting
- Anyone with untreated decay, cracked teeth, or gum disease — fix the problem first, whiten second
- People with peroxide allergies — rare but real; a dentist can suggest alternatives
- Anyone about to get crowns, veneers, or fillings on front teeth — whitening changes your natural shade, but dental restorations won’t whiten, so bleach first, then color-match the new work
- People with bluish-gray or tetracycline staining — trays can help but often need months of use or professional-strength options
Existing crowns, veneers, and fillings will not lighten with trays. Whitening only changes natural tooth structure. If your front crowns already match your current smile, bleaching could leave them looking yellow against newly whitened teeth.
7 Mistakes That Ruin Whitening Tray Results
Most failed treatments trace back to the same handful of errors. Steer around these:
- Loading too much gel. Overflow irritates gums and doesn’t speed anything up. A thin bead wins.
- Whitening on dirty teeth. Plaque and tartar block the gel. Get a professional cleaning first if you’re overdue.
- Skipping days, then doubling up. Consistency beats intensity. A missed day just extends your timeline.
- Drinking coffee or red wine during treatment. You’re bleaching and staining at the same time. That’s a tie you’ll lose.
- Ignoring the fit. A warped or loose tray delivers gel to your gums instead of your enamel. Remold a boil-and-bite tray or ask your dentist to adjust a custom one.
- Using expired gel. Old peroxide loses potency quietly. You’ll wear the tray for weeks and see nothing.
- Whitening right before restorative work. Bleach first, wait two weeks for your shade to settle, then let your dentist match the crown or filling.
How to Clean and Store Your Trays
Your trays will outlive dozens of gel syringes if you treat them right. Rinse them with cool water after every session and brush gently with a soft toothbrush — no toothpaste, since abrasives scratch the plastic and create hiding spots for bacteria.
Let the trays air-dry completely before storing them in their case. A damp, closed case grows mold fast. Keep them away from heat: no hot cars, no hot water, no sunny windowsills, because warped trays stop fitting. Bring your trays to dental cleanings too. Your hygienist can give them a professional clean and spot small damage before it ruins a treatment.
Frequently Asked Questions About Whitening Trays
Do whitening trays actually work?
Yes. Multiple randomized trials reviewed by Cochrane confirm that peroxide gel in trays whitens teeth better than placebo. Custom whitening trays with 10% carbamide peroxide remain the most proven at-home method, typically lifting 4 to 8 shades over two weeks.
How long should you wear whitening trays each day?
It depends on your gel strength. With 10% carbamide peroxide, dentists often prescribe overnight wear or 2 to 4 hours. Gels from 16% to 22% usually call for 30 minutes to 1 hour. Follow the directions that come with your specific gel rather than a universal rule.
Can you sleep with whitening trays in?
You can, but only with low-strength gel. Overnight wear works with 10% carbamide peroxide, which releases peroxide slowly over hours. Never sleep in trays with high-concentration gel — that’s a fast track to serious sensitivity.
Are whitening trays safe for your enamel?
Yes, when used as directed. Research reviewed by the ADA shows peroxide bleaching does not permanently damage enamel. The sensitivity it can cause is temporary and fades within days of finishing treatment.
Why do whitening trays make my teeth hurt?
The peroxide travels through enamel tubules and briefly irritates the nerve inside each tooth. Up to two-thirds of users feel some sensitivity early on, according to the ADA. It’s mild, temporary, and manageable with potassium nitrate toothpaste and shorter sessions.
How long do whitening tray results last?
Expect 6 months to 3 years, depending on your habits. Coffee, tea, red wine, and smoking pull the shade back faster. Most people maintain results with a one- or two-day touch-up every six months using their stored trays and fresh gel.
Your Brighter Smile Starts This Week
You now know more about whitening trays than most people learn after three failed drugstore kits. You know the fit drives the results, 10% carbamide peroxide offers the best-studied balance of safety and whitening power, and sensitivity is common but temporary and mostly preventable.
Here’s your simplest next step: book a dental cleaning. A clean mouth bleaches faster, hurts less, and your dentist can tell you in two minutes whether custom trays or a budget kit suits your teeth. If you’d rather start today, grab a boil-and-bite kit and a potassium nitrate toothpaste, and follow the step-by-step routine above.
Got a question about your specific stain, sensitivity level, or budget? Drop it in the comments below — we answer every one, and your question might shape our next guide.